



Calibrating an induction heater brazing machine is a crucial process that ensures the machine operates at its optimal performance, delivering consistent and high - quality brazing results. As a supplier of Induction Heater Brazing Machines, I understand the significance of proper calibration and am here to guide you through the process.
Understanding the Basics of Induction Heater Brazing Machines
Before diving into the calibration process, it's essential to have a basic understanding of how an induction heater brazing machine works. Induction heating is a non - contact heating process that uses electromagnetic fields to generate heat within a conductive material. In brazing, this heat is used to melt a filler metal, which then flows into the joint between two workpieces, creating a strong bond.

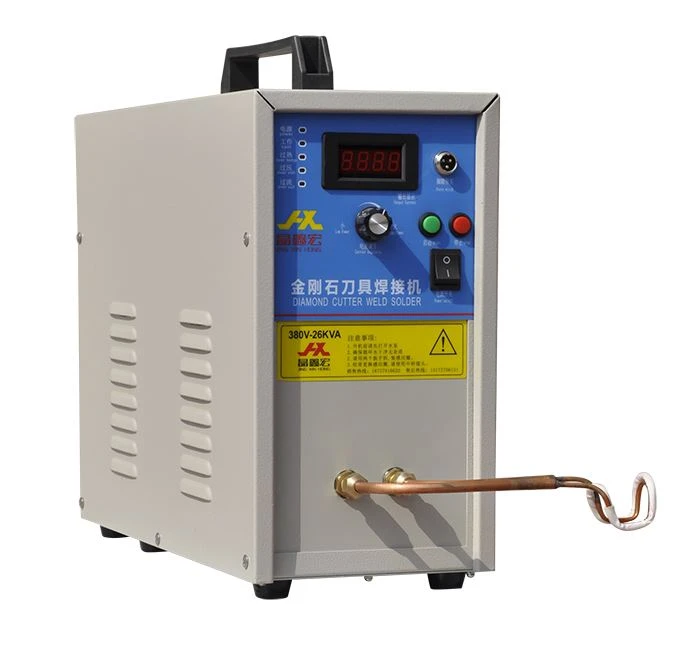
The main components of an induction heater brazing machine include a power supply, an induction coil, a cooling system, and a control unit. The power supply converts the input electrical energy into high - frequency alternating current, which is then passed through the induction coil. The coil creates an alternating magnetic field, which induces eddy currents in the workpiece, generating heat.
Pre - Calibration Checks
Before starting the calibration process, it's important to perform a series of pre - calibration checks to ensure the machine is in good working condition.
- Visual Inspection: Check the induction coil for any signs of damage, such as cracks, burns, or loose connections. A damaged coil can affect the heating efficiency and accuracy of the machine. Also, inspect the cooling system for leaks, blockages, or low coolant levels. Proper cooling is essential to prevent overheating of the machine components.
- Electrical Checks: Use a multimeter to check the electrical connections and ensure there are no loose wires or short circuits. Measure the input voltage to the power supply and make sure it is within the specified range. Any deviation from the normal voltage can cause the machine to operate inefficiently or even damage the components.
- Mechanical Checks: Check the mechanical parts of the machine, such as the workpiece holders and the movement mechanisms. Ensure that they are properly aligned and functioning smoothly. Misaligned workpiece holders can lead to inconsistent heating and poor brazing quality.
Calibration Steps
1. Power Output Calibration
The power output of the induction heater brazing machine is a critical parameter that directly affects the heating rate and the quality of the brazing. To calibrate the power output:
- Use a Power Meter: Connect a power meter to the output of the power supply. This will allow you to measure the actual power being delivered to the induction coil.
- Adjust the Power Settings: Refer to the machine's manual to find the recommended power settings for the specific brazing application. Use the control unit of the machine to adjust the power output until it matches the desired value. Make small adjustments and measure the power output after each adjustment to ensure accuracy.
- Verify the Power Output: Once you have set the power output, perform a test run on a sample workpiece. Monitor the heating rate and the temperature of the workpiece to ensure that the power output is sufficient for the brazing process. If necessary, make further adjustments to the power settings.
2. Frequency Calibration
The frequency of the alternating current in the induction coil also plays an important role in the induction heating process. Different materials and workpiece geometries require different frequencies for optimal heating.
- Understand the Frequency Requirements: Consult the material specifications and the brazing application requirements to determine the appropriate frequency range. For example, smaller workpieces or materials with high electrical conductivity may require higher frequencies, while larger workpieces or materials with low conductivity may require lower frequencies.
- Use a Frequency Meter: Connect a frequency meter to the output of the power supply to measure the actual frequency.
- Adjust the Frequency Settings: Use the control unit of the machine to adjust the frequency until it matches the desired value. Similar to power output calibration, make small adjustments and measure the frequency after each adjustment.
- Test the Frequency: Perform a test run on a sample workpiece using the calibrated frequency. Observe the heating pattern and the quality of the brazing. If the heating is uneven or the brazing quality is poor, you may need to further adjust the frequency.
3. Temperature Calibration
Accurate temperature control is essential for successful brazing. Incorrect temperatures can lead to incomplete melting of the filler metal, poor joint strength, or even damage to the workpieces.
- Use a Temperature Sensor: There are several types of temperature sensors available, such as thermocouples and infrared pyrometers. Select a suitable temperature sensor based on the application requirements and install it in the appropriate position near the brazing joint.
- Calibrate the Temperature Sensor: Follow the manufacturer's instructions to calibrate the temperature sensor. This usually involves comparing the readings of the sensor with a known reference temperature source.
- Set the Temperature Control Parameters: Use the control unit of the machine to set the desired brazing temperature. The machine should be able to maintain the temperature within a narrow tolerance range during the brazing process.
- Verify the Temperature Control: Perform a test run on a sample workpiece and monitor the temperature using the calibrated sensor. Check if the machine can maintain the set temperature accurately. If there are any deviations, adjust the temperature control parameters accordingly.
Post - Calibration Verification
After completing the calibration process, it's important to perform a post - calibration verification to ensure that the machine is operating correctly.
- Perform a Test Brazing: Use the calibrated machine to braze a series of sample workpieces. Inspect the brazed joints for quality, including the appearance, the strength of the bond, and the absence of defects such as porosity or cracks.
- Measure the Process Parameters: During the test brazing, measure the power output, frequency, and temperature to ensure that they are still within the calibrated range. If any of the parameters have deviated, repeat the calibration process.
- Document the Calibration Results: Keep a record of the calibration process, including the pre - calibration checks, the calibration steps, and the post - calibration verification results. This documentation will be useful for future reference and for quality control purposes.
Conclusion
Calibrating an induction heater brazing machine is a complex but essential process that requires careful attention to detail. By following the steps outlined above, you can ensure that your machine operates at its optimal performance, delivering consistent and high - quality brazing results.
If you are in the market for an induction heater brazing machine, we offer a wide range of Induction Brazing Equipment, Segment Brazing Machine, and Induction Soldering Machine. Our machines are designed with the latest technology and are built to last. If you have any questions or would like to discuss your specific brazing requirements, please feel free to contact us for a detailed consultation and to start the procurement process.
References
- ASM Handbook Volume 6: Welding, Brazing, and Soldering. ASM International.
- Induction Heating Handbook: Principles, Design, and Applications for Industry. Marcel Dekker.
- Brazing and Soldering: Principles, Practices, and Applications. The Welding Institute.